As a seasoned homeowner, you know the frustration of trying to remove old décor or rearrange furniture, only to be left with unsightly holes in the walls. But fear not, there’s a genius trick that can help you achieve a smooth, flawless finish without causing any permanent damage.
Forget about the days of spackle and endless sanding – this simple method allows you to remove those pesky drywall anchors and screws while leaving behind a seamless surface, ready for a fresh start. Prepare to be amazed at how easy it is to transform your space without a single ugly hole in sight.
Ditch the Drywall Destruction
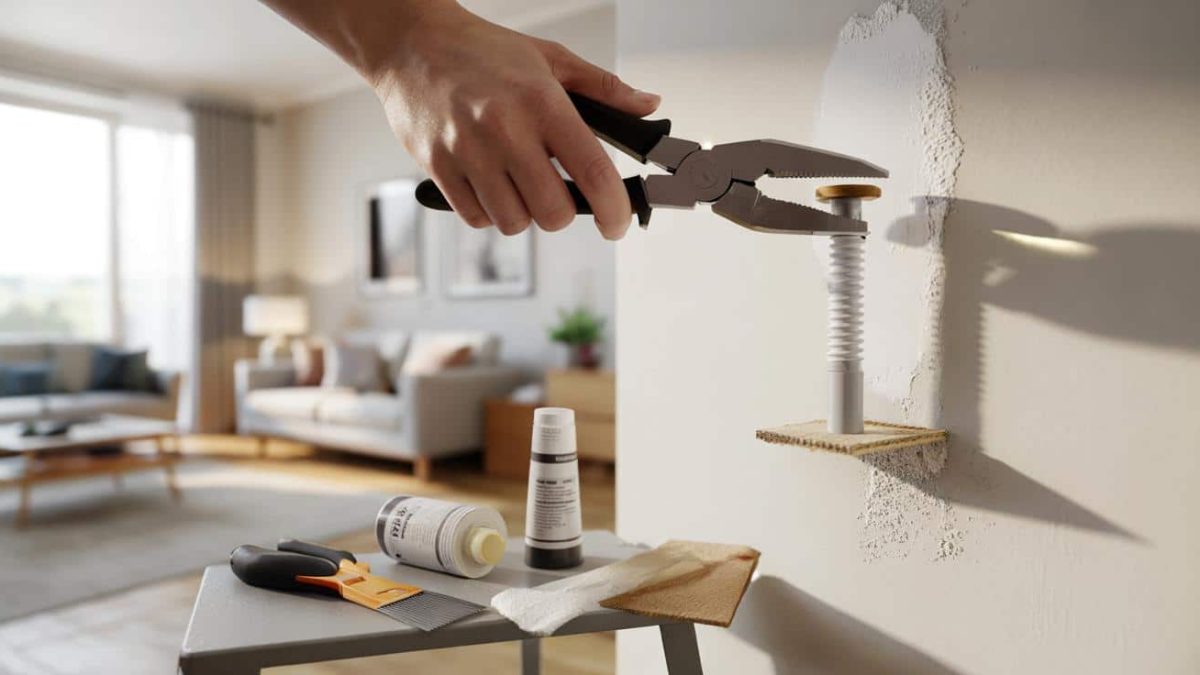
When it comes to redecorating, the most daunting task is often dealing with the aftermath of removed fixtures and hardware. The temptation to simply yank out those drywall anchors and screws can be strong, but resist the urge to resort to brute force. This approach often leads to crumbling plaster, unsightly cracks, and a wall that’s anything but ready for a makeover.
Instead, adopt a more delicate touch and discover the power of the humble putty knife. By carefully prying and levering the drywall anchors out of the wall, you can extract them without causing any major damage. This gentle method leaves behind a smooth surface, ready for a seamless repair job.
But the magic doesn’t stop there. Once the anchors are removed, you can use a simple spackle or joint compound to fill in the small holes, creating a blank canvas for your next design project.
The Smooth Operator: Mastering the Drywall Repair Process
With the drywall anchors out of the way, it’s time to tackle the repair process and ensure a flawless finish. Start by thoroughly cleaning the area, removing any loose debris or dust that could interfere with the spackle’s adhesion. Next, apply a thin layer of joint compound or spackle, smoothing it out with a putty knife to create a seamless surface.
The key to achieving a professional-looking result is to take your time and pay attention to the details. Lightly sand the area once the spackle has dried, ensuring a perfectly smooth finish. If needed, apply a second layer of compound to fill in any remaining imperfections.
With the wall prepped and ready, it’s time to add the finishing touches. A quick coat of paint, matched to the existing wall color, will blend the repaired area and leave no trace of your previous hardware. The result? A wall that looks as if it was never disturbed, allowing you to start fresh with your new décor.
Embrace the Effortless Elegance of Drywall Anchor Removal
Removing drywall anchors and screws without damaging the surrounding surface may seem like a daunting task, but with the right techniques, it’s a breeze. By leveraging the power of the putty knife and taking a meticulous approach to the repair process, you can transform your walls from scarred and unsightly to smooth and seamless.
So, the next time you’re ready to switch up your home’s look, don’t let the fear of drywall damage hold you back. Embrace this genius trick and enjoy the satisfaction of a freshly prepped canvas, ready for your creative vision to shine.
Perfecting the Art of Invisible Repairs
Once you’ve mastered the art of drywall anchor removal, the next step is to ensure that your repairs are truly invisible. This is where the true magic happens – transforming a patched wall into a flawless, uniform surface that blends seamlessly with the rest of your décor.
The key is in the preparation and attention to detail. Take the time to lightly sand the repaired area, ensuring a perfectly smooth finish. Then, carefully match the paint color to the existing wall, blending the newly repaired section with its surroundings.
With a little elbow grease and a keen eye for detail, you can create a wall that looks as if it was never disturbed. This attention to perfection not only preserves the overall aesthetic of your home but also allows you the freedom to rearrange and redecorate without fear of unsightly reminders of the past.
Unlock the Full Potential of Your Walls
Drywall anchors and screws may be a necessary evil when it comes to hanging décor and furniture, but they don’t have to be a permanent blemish on your walls. By embracing this genius trick, you can unlock the full potential of your home’s surfaces, transforming them into a blank canvas that’s ready for your next design adventure.
Whether you’re swapping out artwork, rearranging furniture, or completely overhauling your space, this simple method ensures a smooth, seamless transition – no unsightly holes in sight. Embrace the effortless elegance of drywall anchor removal and experience the joy of a truly customizable home, where your walls are a reflection of your style, not the remnants of your past décor.
FAQs: Mastering the Art of Drywall Anchor Removal
How do I safely remove drywall anchors without damaging the wall?
The key is to use a putty knife to gently pry and lever the anchors out of the wall. This delicate approach allows you to extract the anchors without crumbling the surrounding drywall.
What’s the best way to repair the holes left behind?
Apply a thin layer of joint compound or spackle to the holes, smoothing it out with a putty knife. Sand lightly once dry, then apply a matching coat of paint to blend the repaired area seamlessly.
How can I ensure the repairs are truly invisible?
Take your time with the preparation and finishing touches. Lightly sand the repaired areas to achieve a perfectly smooth surface, and carefully match the paint color to the existing wall. The goal is to create a flawless, uniform look.
What tools do I need for this drywall anchor removal method?
You’ll need a putty knife, joint compound or spackle, sandpaper, and paint matched to your wall color. A utility knife or small pry tool can also be helpful for stubborn anchors.
How long does the repair process typically take?
The time required can vary depending on the number of anchors and the condition of the wall, but the process is generally quick and straightforward. Expect to spend 30 minutes to an hour for a standard room-sized project.
- ➡Diese Frühjahrs-Idee macht deinen Garten zum Vogel- und Beerenparadies
- ➡Dieser orange blühende Mini-Strauch macht kleine Gärten monatelang bunt
- ➡Lidl bringt Pilates-Reformer für zuhause: Was taugt das 299-Euro-Gerät?
- ➡Genialer Trick: So wird ein alter Drahtbügel in 3 Minuten zur Futterstelle für Vögel
Can this method be used for any type of drywall anchor?
Yes, the gentle prying and levering technique works for a variety of drywall anchors, including plastic, metal, and even the more stubborn screw-in varieties.
Will the repaired areas be completely invisible after painting?
With proper preparation and attention to detail, the repaired areas should blend seamlessly with the rest of the wall, becoming virtually invisible once painted.
Can I use this method to remove other types of wall hardware?
Absolutely! The same gentle approach can be applied to removing screws, nails, and other wall-mounted fixtures, leaving behind a smooth surface ready for your next project.