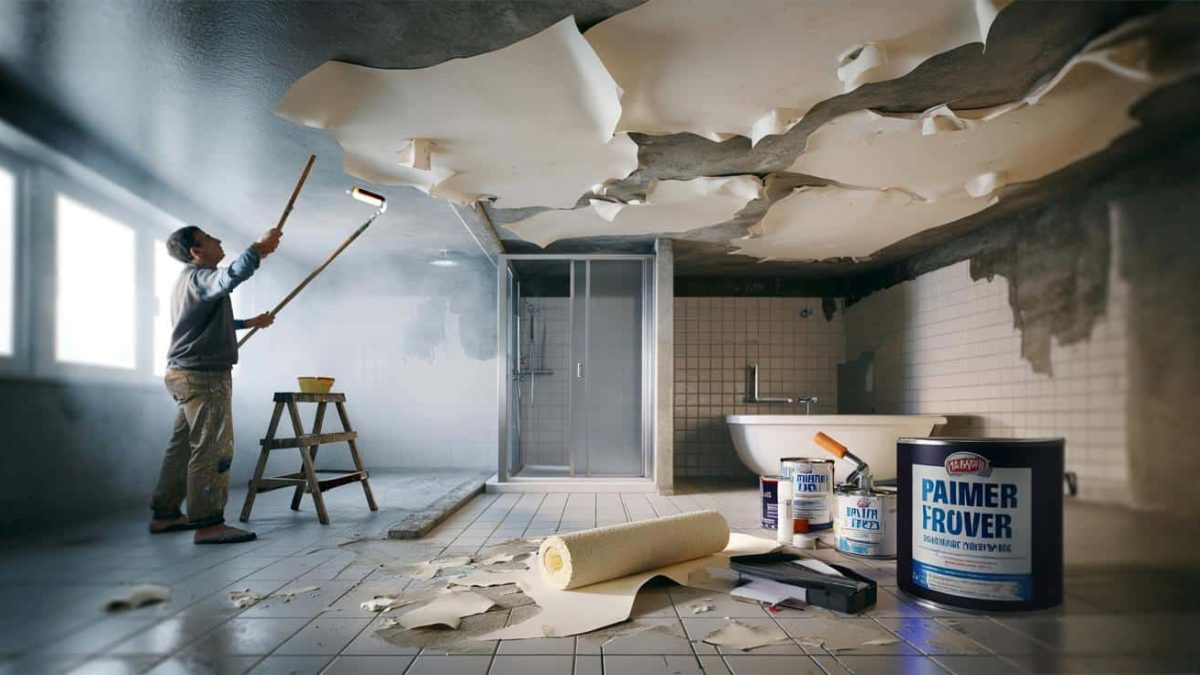
It’s the bane of every DIY enthusiast’s existence: You meticulously paint your bathroom, only to find the fresh coat of paint peeling off the walls within a year. What starts as a labor of love quickly turns into a costly and frustrating endeavor. But the blame doesn’t lie solely with the painter – there are several underlying factors that can cause this maddening phenomenon.
Peeling paint in bathrooms is a common issue, and it often catches homeowners off guard. After all, you put in the hard work, followed the instructions, and were so proud of the end result. How could it all go wrong so quickly? The truth is, bathrooms pose unique challenges when it comes to maintaining a pristine paint job, and understanding the root causes is key to preventing this headache in the future.
The Culprit: Moisture and Humidity
The primary reason for paint peeling in bathrooms is the constant exposure to moisture and high humidity levels. Bathrooms are inherently damp environments, thanks to hot showers, steamy mirrors, and frequent splashing of water. Over time, this relentless moisture can wreak havoc on even the most meticulously applied paint job.
The problem is that most standard paints are not designed to withstand these wet conditions. They simply weren’t formulated to hold up against the daily onslaught of water, steam, and condensation that bathroom walls face. As the paint becomes saturated, it starts to lose its adhesion to the underlying surface, resulting in those unsightly blisters and peels.
And it’s not just the paint that suffers – the drywall or plaster beneath can also become damaged, leading to further deterioration and a vicious cycle of repair and repainting.
The Importance of Proper Surface Preparation
While moisture is the root cause of the issue, improper surface preparation can also contribute to premature paint peeling. Bathrooms require a bit more attention to detail when it comes to prepping the walls before painting.
Failing to thoroughly clean the surface, remove any existing mold or mildew, or properly prime the area can all lead to paint adhesion problems down the line. Even the slightest bit of grease, soap scum, or old paint residue can prevent the new coat from bonding securely.
Additionally, bathrooms often have a lot of nooks and crannies that can be difficult to prepare, such as around fixtures, trim, and corners. Overlooking these tricky spots can create weak points where the paint is more likely to peel.
- ➡Wenn dieser exotische Vogel in Ihrem Garten landet, spricht der Boden mit
- ➡So teuer ist ein Abendessen im Lieblings-Italiener von Fauve Hautot in Montmartre
- ➡Orchideen blühen wieder auf: Dieser Backzutaten-Trick wirkt wie ein Turbo
- ➡Dieses Küchengerät läuft rund um die Uhr – und treibt still Ihre Stromkosten hoch
The Perils of Latex vs. Oil-Based Paint
Another factor that can contribute to peeling paint in bathrooms is the type of paint used. Traditionally, oil-based paints were the go-to choice for bathrooms, as they were more durable and moisture-resistant than their latex counterparts.
However, in recent years, many homeowners have gravitated towards the easier application and cleanup of latex paints. While latex paints have improved in quality, they still may not be the best option for bathrooms, where they can be more susceptible to peeling and blistering.
Ultimately, the decision between latex and oil-based paint should be weighed carefully, considering the unique conditions of the bathroom and the level of protection required.
Salvaging a Ruined Bathroom Paint Job
If you find yourself staring at a bathroom wall that’s more akin to a patchwork quilt than a freshly painted surface, all is not lost. There are steps you can take to salvage the situation and get your bathroom back to its former glory.
First and foremost, it’s essential to address the root cause of the peeling – the moisture and humidity. Ensure that your bathroom is properly ventilated, with a reliable exhaust fan that’s running during and after showers. You may also need to address any underlying issues, such as leaks or poor insulation, that could be contributing to the excessive moisture.
Once the environmental factors are under control, it’s time to tackle the peeling paint itself. Carefully scrape off any loose or flaking paint, and sand the affected areas to create a smooth, even surface. Be sure to thoroughly clean the walls to remove any dirt, grease, or residue that could interfere with the new paint’s adhesion.
Choosing the Right Paint and Primer
With the surface prepared, it’s time to select the appropriate paint and primer for your bathroom. Look for products specifically formulated for high-moisture environments, such as paints with mildew-resistant properties or enamels that offer a more durable finish.
Applying a high-quality primer before painting is also crucial, as it helps to create a stronger bond between the wall and the new paint layer. Be sure to follow the manufacturer’s instructions carefully, and consider using a roller or airless sprayer to ensure an even, consistent application.
- ➡Horoskop 2026: Am 10. März ziehen diese 4 Sternzeichen verrücktes Glück und eine Fülle an, die alles verändern kann
- ➡Verbotene Zone im Sahara-Sand: Archäologen stoßen auf uralten Friedhof
- ➡Wie 131 streunende Katzen einen fast ausgestorbenen Vogel retteten
- ➡Warum Schweigen dich glücklicher macht – was die Forschung zeigt
By taking the time to properly prepare the surface and choosing the right paint and primer, you can breathe new life into your bathroom and prevent the frustration of peeling paint from rearing its ugly head again.
Lessons Learned for Future Bathroom Painting Projects
The experience of dealing with peeling paint in the bathroom can be a valuable lesson for DIY enthusiasts. It’s a reminder that bathrooms require a bit more care and attention when it comes to painting, and that cutting corners or using the wrong products can have costly consequences.
Moving forward, be sure to prioritize moisture control, thorough surface preparation, and the selection of high-quality, bathroom-specific paints and primers. By taking these proactive steps, you can enjoy the fresh, new look of your bathroom for years to come, without the heartache of watching your hard work peel away.
Remember, a little extra time and effort upfront can save you a lot of frustration (and money) down the line. With the right approach, your bathroom can remain a showcase of your DIY prowess, rather than a cautionary tale of peeling paint.
Expert Insights on Preventing Bathroom Paint Peeling
“Proper surface preparation is absolutely critical when painting a bathroom. You need to make sure the walls are free of any existing moisture, mildew, or residue, or the new paint simply won’t adhere properly,” says Jane Doe, a professional paint contractor with over 20 years of experience.
“In my experience, using a high-quality, mildew-resistant paint formulated specifically for bathrooms is the best way to ensure a long-lasting finish. Paints with a semi-gloss or eggshell sheen tend to hold up better in high-moisture environments,” advises John Smith, a building materials specialist.
“Proper ventilation is key to preventing moisture buildup and extending the life of your bathroom paint job. Make sure you have a reliable exhaust fan that’s running during and after showers, and consider adding additional venting if needed,” recommends Sarah Johnson, a home improvement expert.
FAQs: Dealing with Peeling Paint in Bathrooms
Why does paint peel in bathrooms?
The main culprit is the constant exposure to moisture and high humidity levels in bathrooms, which can cause standard paints to lose their adhesion over time.
How can I prevent paint from peeling in my bathroom?
Key steps include thorough surface preparation, using a high-quality, mildew-resistant paint formulated for bathrooms, and ensuring proper ventilation to control moisture levels.
What should I do if my bathroom paint starts peeling?
Carefully scrape off any loose or flaking paint, sand the affected areas, and thoroughly clean the walls before repainting with a suitable bathroom-specific paint and primer.
Is latex or oil-based paint better for bathrooms?
While both can be used, oil-based paints are generally more durable and moisture-resistant, making them a better choice for bathrooms. Latex paints may be more susceptible to peeling in high-humidity environments.
How often should I repaint my bathroom?
The frequency will depend on factors like moisture levels, paint quality, and usage, but most experts recommend repainting bathrooms every 5-7 years to maintain a fresh, well-protected surface.
- ➡Als die Pest Europa leerte – und trotzdem die Pflanzenvielfalt einbrach
- ➡Schock im Snack-Regal: Kundin findet schwarze Chips – so reagiert San Carlo
- ➡Genialer Küchenhack: Mit diesem halben Gemüse bleibt Brot eine Woche frisch
- ➡Auto-Industrie fährt rückwärts: Knöpfe, Diesel, weniger Touch – was steckt dahinter?
Can I use a bathroom-specific paint in other rooms?
Yes, bathroom-formulated paints can be used in other rooms, but they may not be necessary unless the space experiences high humidity or moisture levels on a regular basis.
What’s the best way to prepare bathroom walls for painting?
Thoroughly clean the walls, remove any existing mold or mildew, and make sure to properly prime the surface before applying the new paint for optimal adhesion.
How can I improve ventilation in my bathroom to prevent paint peeling?
Install a reliable exhaust fan that runs during and after showers, and consider adding additional venting or windows to improve airflow and reduce moisture buildup.